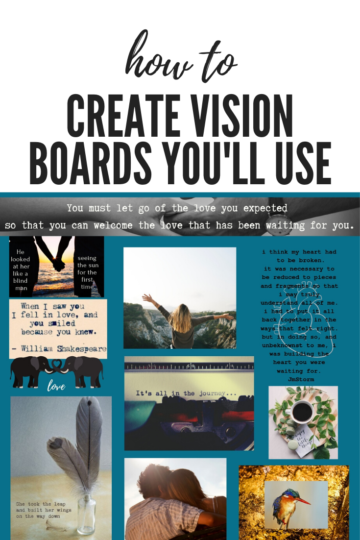
Do you want to master the art of making awesome vision boards that you will actually use? You are in the right place because I made some pretty sweet vision boards to kick off the new year. The KEY is to create something that fits you, and your dreams, something that you will want to look at every day. Whether it’s in your bedroom, living room, your car, your office – wherever it may be – it will be something you get energy from looking at regularly.
Focusing on what you want in your life is super important. You need to know your destination, and you need directions in order to get there. Setting goals, in vision form, keep them in front of you. We all need a little focus, a little vision, a little hope.
Listen up though, I don’t believe that just cutting out a picture and putting it on a board will make your dream home magically appear. No, you put things on vision boards so you continue to think about them, to be hopeful and energized about the possibilities you can bring in to your life. That focus and that feeling energize you to work toward those goals.
Setting Intentions
I knew right away that I didn’t want a traditional giant poster board. Because our house is tiny and the wall space is sacred! I wanted to make something that I would actually finish, use, and see regularly.
I decided to make a few different types of boards. But before I started I spent some good old quality time with my thoughts, intentions, dreams, hopes, etc. I know the research says you need to be really specific when setting goals and visions. These visions generate feelings that you are also supposed to zero in on.
Setting intentions is a really important part of the process so I created a few worksheets to help you. If you want to try them out, sign up below for a free download.
Let the collage-o-rama begin
Settling on a few themes to focus my thoughts didn’t take long. I chose to concentrate on career, home, money, gratitude, and life. And by “life” I mean my actual breathing body that is living in this world. It is my health, my joy, my soul etc.
The first board I made was an accordion-style one. I used chipboard taped together. This style folds nicely AND sits easily on a ledge. I used one side of the board to write out all my thoughts and visions for that particular topic. When I filled up the back side of each board, and had a clear vision, I moved on to cutting images and words that fit with what I’d written.
Then the collage-ing began! My first boards were not super artistic but that’s ok that wasn’t the point. I wanted my boards to remind me of my visions; I wasn’t making art here. And this one worked for me.
After I was done with the first set, I decided to try a more artsy looking one. I had a friend who made a beautiful board based on a Soul Collage® which is a lovely collage process.
Her card was so pretty, so I copied that method. She basically used a really lovely background and then layered everything in a beautiful way. So rather than focusing on the words or just pasting them up, she focused on making a visually appealing layout.
My third one might be my favorite one so far and I already have it up and look at it every day. It is a digital board that I created online and printed at Costco! I used Canva (read my post about my love affair with Canva here). I made a tutorial about how to do that here so you can make one too!
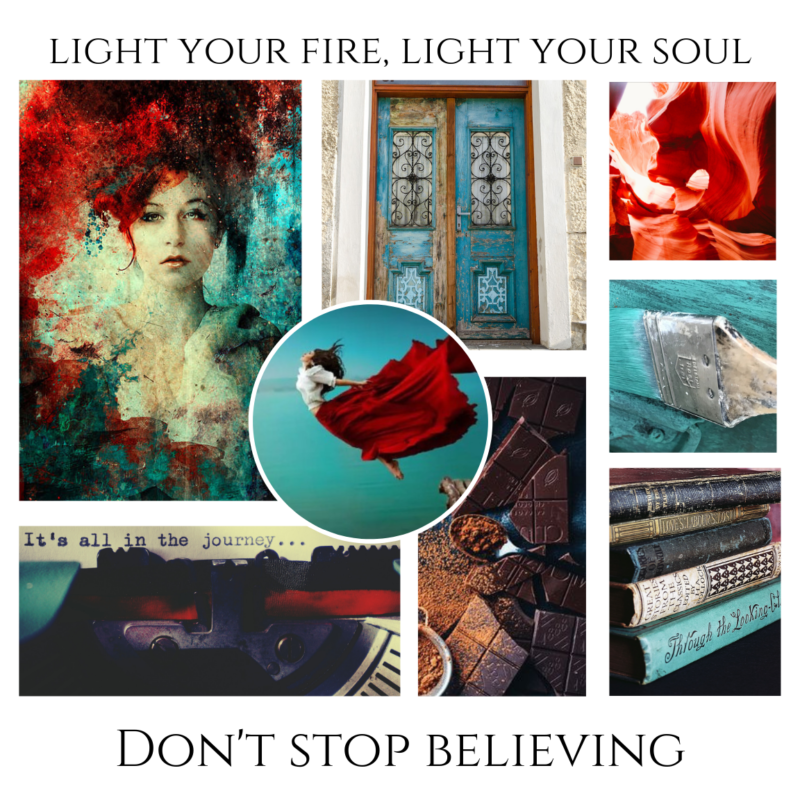
One thing I really want to emphasize here is that there are NO RULES. This is your process, your board, your life. Because I did it this way doesn’t mean you have to! I’ll say it again, no rules! You want this to be a vision board you will actually use! But I did include some instructions as a starting point if you need them! So, here goes:
Instructions for making
Vision Boards You Will Actually Use
Materials Needed for the paper ones:
- Pre-vision board worksheet
(sign up above to get yours free) - Boards (chipboard, cardstock, cardboard, anything works here)
- Magazines, old cards, ephemera
- Glue sticks
Get Started:
- Finish the worksheets, or spend some time in thought before you start so that you can get clear on your desires.
- Choose your board background. This can be chipboard, cardstock, a piece of cardboard, an old piece of art you don’t mind covering. Try to choose something that is a little sturdy so it holds up to all the gluing.
- Next, get to gathering your images, words, doohickeys, whatever you want to put on your board. It doesn’t have to be 2D! You can use a leaf, ribbon, trinket, whatever you want. Don’t limit yourself. This is YOUR board there is no wrong way to do this.
- As you gather up your treasures it is easiest to sort in piles as you go. So I made a
career pile, a money pile, etc. You can use envelopes if that is easier for you. This will help you see all you have on a topic in one place. - Now get to laying out! Don’t glue just yet. There are endless ways to do this. If you choose one large board you can have it all over the place, whatever speaks to you. Or, you can do it in sections. I used this method for my digital one. But for my accordion style
one I used one board for each topic. It’s up to you! - Once you have an idea of your layout then you can start gluing. Though listen, if you are free-willy type then just go for it! No rules, remember!
What you need for a DIGITAL board:
- Pre-vision board worksheet (sign up to get yours free)
- A free Canva Account
Get Started on Your Digital Vision Board
- Finish the worksheets, or spend some time in thought before you start so you can get clear on your desires.
- Log in to Canva and create a design in the dimension you will want to print out. I printed mine at Costco so I chose an option they had available and went with a 12″ x 12″ square.
- Pick a Canva template to start or just use a simple solid background color.
- In the elements box search for graphics, photos, text etc. that speaks to you. Search for free images on the interwebs. Create little text boxes with inspirational quotes.
- Now get to laying out! Just start dragging dropping all the goodies in your design window and move them around until it sparks joy. No rules, remember!
Enjoy making your visions come to life and focusing on making them come true.

 The Truth About Creativity
Looking for tips on creating a “vision board” that doesn’t have pictures. I am not a visual person. I am trying to think of a way of applying the concepts or core ideas of a vision board into a non-picture format. cutting up magazines and saving pictures makes me feel silly. I never liked making murals. So, what is the core concept of a vision board? And have you ever had that translated into a “non-visual vision board”?
Hi Rachel!
Thanks for leaving a comment, what a great question!
The core concept of the vision board is to bring your intentions to the fore front so that you focus your energy on bringing about what you are dreaming about. The vision boards are just one way to do that – it is a concrete way to see your dreams and intentions in one place. But there are certainly non-visual ways to do this as well. Whatever works to focus your attention will do the trick. It might be words instead of images. You can use different fonts, colors, arrangements, etc. It might also be fun to explore an audio version. If music or spoken word appeals to you then you could make a “playlist” that you listen to regularly. Perhaps something as simple as a series of mantra’s that you speak out loud to yourself. As long as you are aiming your thoughts and visions toward what you want to achieve I think you can achieve the same purpose as a vision board! Please let me know if you have any other questions. I’d be happy to work through creating something with you – I’m sure you aren’t the only non-visual person out there with this question!
Take care!
Alison
Really informative blog post. Much obliged.
I am still trying to figure out how best to reinvent myself. I want to use my skills and mission as a teacher without going back into the classroom. I am a helper personality. I would love to write non-fiction books for K-12, maybe some fiction books. I thought about social services, but don’t want to worry about codependency and stress. How do I put these into a vision board? I still need to have an income while working on writing. Do I include this on the board? I have a large wall board split into thirds. The left and right sides I have inspirational quotes. The center I have left for future vision. I am also recovering from a major car accident and am dealing with depression. Future vision is a major challenge.
Hi Christine! I completely understand your worries about income while you write your book! I have struggled with this as well -“if I take a job to pay the bills I won’t have time to write!” I am a strong believer that we live in an abundant universe and that we can have a life we love and live in fully. What works for me is to be completely honest with myself about what I want my life to look like – and in my case it was NOT taking a job for someone else. I spent time imagining what my life would be like, what freedoms I would have with my time, how that would feel, etc.
You don’t have to know exactly what it will look like but try to imagine the feelings that you’ll have using your skills and unique talents as a helper, writing stories that might change a kids life! Imagine what it will FEEL like to be healthy and strong again. What types of images or colors come to mind? Maybe your center board is colors, abstracts, finger painting and not images at all. Maybe it’s pieces of notebook paper, a pen nib, or some other 3D pieces attached.
I hope this helps a little bit. Please let me know if you have any other questions!
Take care!!
Alison